Pawsome-Specializing in vet health products since 2015
Using a Wire Plier looks simple, but controlled technique matters. A careless squeeze can crush insulation, deform copper, or leave sharp metal edges. This guide explains how to choose, hold, and operate the tool with greater confidence.
Chris Grundy, a tool educator and television host, offers practical advice: “Use the right tool for the job, and let the tool do the work.” That principle applies directly to every Wire Plier task. Select a cutter, stripper, or long-nose model that matches the wire size. Check the handles, hinge, jaws, and insulation before starting. Keep the jaws clean and dry. Wear safety glasses when cutting wire, because small fragments can travel quickly. Never use a Wire Plier as a hammer, wrench, or live electrical tool. Disconnect power and verify it with a suitable tester.
Hold the tool near the hinge for stronger control. Place the wire fully between the intended cutting edges. Squeeze steadily, rather than forcing the handles suddenly. For stripping, rotate gently and pull away without nicking the conductor. Inspect the result under good light. The insulation should remain smooth, and the copper should look round, not flattened. Mistakes happen, especially when working quickly. I have found that slowing down by a few seconds prevents repeated cuts and wasted wire. Still, no guide replaces training or the manufacturer’s instructions. If the hinge feels loose or the jaws no longer meet evenly, replace the tool. Good technique protects the wire, the project, and the person holding the Wire Plier.
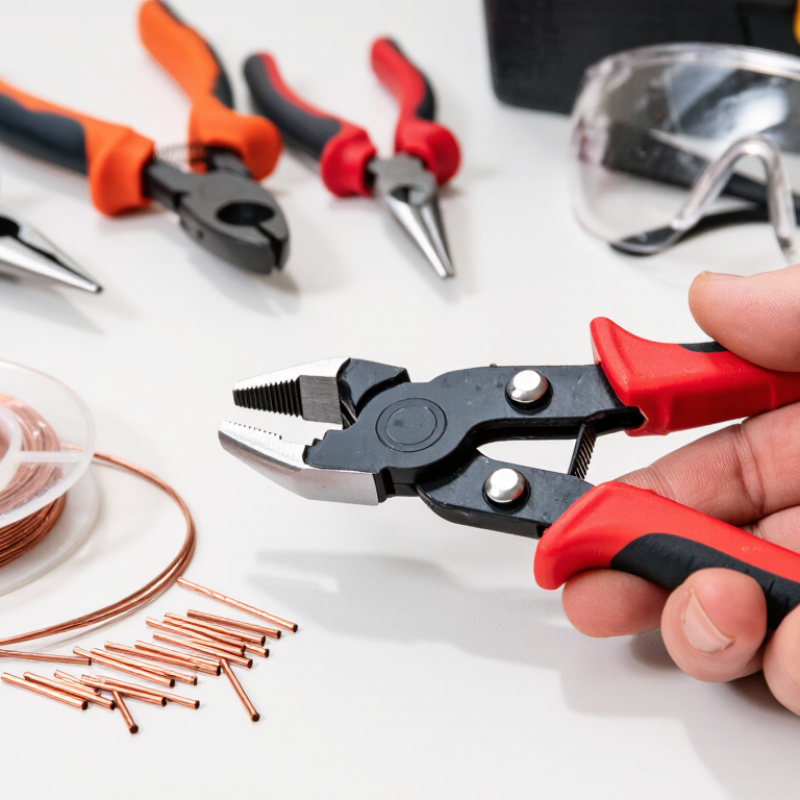
Choosing the right wire plier starts with identifying the wire, not the tool’s appearance. Thin copper wire needs narrow, smooth jaws that can bend without leaving deep marks. A needle-nose plier works well in cramped spaces. For thicker wire, choose a cutter rated for its diameter and material. Combination pliers can grip, bend, and cut, but they may feel bulky for delicate work.
Check the jaws before buying. They should meet evenly and move without grinding. Handles should feel secure, even when your hands are slightly oily. Insulated handles add protection, but they do not make a tool safe for every electrical task. Always follow the tool’s voltage rating and work on de-energized circuits when required. Never use ordinary pliers as a substitute for a dedicated stripping tool. The wire may flatten.
Small details matter. Choose a length that gives control without excessive force. A compact plier is easier to guide inside a narrow junction box. A longer handle may help with thicker wire, but it can encourage overcutting. I once chose a cutter that was too large for a small repair. It worked, but the insulation became scratched. That mistake reminded me to inspect the finished wire, not just the tool. Hold the wire near the joint, keep your fingers behind the jaws, and cut with steady pressure. Stop if the plier slips. It may be the wrong type, or the wire may exceed its rated capacity.
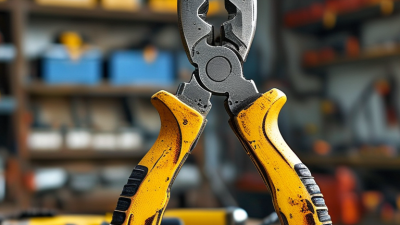
Before using a wire plier, inspect it under bright light. Check the jaws for chips, uneven edges, or trapped debris. The pivot should move smoothly, without grinding or excessive looseness. Squeeze the handles gently. They should return without sticking. Examine the insulation, if present, for cracks, cuts, or exposed metal. Do not treat a clean appearance as proof of safety. Small damage can hide near the hinge. I once missed a tiny split there, and the handle felt less stable than expected. That mistake changed my inspection routine.
Prepare a firm, well-lit work surface before cutting or gripping wire. Remove loose scraps, oily cloths, and objects that could shift under pressure. Keep the wire supported, but leave enough space for the jaws to open fully. Position your hands away from the cutting edge. Wear suitable eye protection, especially when trimming stiff wire. Confirm that the wire is not energized before touching it. If its condition or purpose is unclear, pause and seek reliable documentation or qualified guidance. A cluttered bench encourages rushed movements. Rushing causes simple errors.
Tips: Wipe the jaws before use. Test the pivot twice. Keep fingers behind the handles. Use the correct jaw area for the task. Never twist the plier sideways unless its design permits it. Recheck the work area after setup. The first inspection can miss a loose offcut beneath the bench edge.
How to Use a Wire Plier Properly
Positioning the wire correctly between the jaws controls both grip and cutting force. Place the wire fully inside the jaw cavity, not across the pointed tips. Keep it perpendicular to the jaw edges. This prevents slipping and uneven marks. For cutting, move the wire closer to the pivot, where leverage is stronger. For gripping, center the wire between the serrated surfaces. Do not crush the insulation. A slight rotation may reveal poor contact.
Hands need room. Keep fingers behind the handles, away from the closing gap. Squeeze steadily, rather than snapping the tool shut. In my workshop experience, rushed positioning causes more damage than limited hand strength. That sounds obvious, but it is often ignored. Inspect the wire after release. Look for flattened insulation, deep jaw marks, or a bent conductor.
The UK Health and Safety Executive reported 561,000 non-fatal workplace injuries in 2022/23, with 7.1 million working days lost. Its figures cover all industries, not plier use alone, but they show why small handling habits matter. Use tools that meet applicable requirements, such as IEC 60900 for insulated tools used near electrical hazards. Never assume insulation makes unsafe work acceptable. I sometimes need a second attempt to seat a stiff wire perfectly. That pause is useful. It exposes poor alignment before force creates a problem.
| Positioning Dimension | Recommended Practice | Typical Target or Range | Why It Matters |
|---|---|---|---|
| Wire location between jaws | Place the wire fully inside the gripping area, away from the jaw tips unless precision access is required. | Centered across the working width of the jaws | Improves grip stability and reduces the chance of the wire slipping sideways. |
| Contact with jaw faces | Ensure both jaw faces contact the wire evenly before applying force. | Full, even contact without a visible gap | Even contact distributes force and helps prevent flattened or damaged insulation. |
| Wire alignment | Keep the wire perpendicular to the jaw edges when gripping, bending, or cutting. | Approximately 90° to the jaw edges | Helps maintain balanced loading and produces a cleaner, more controlled result. |
| Distance from the pivot | For gripping or twisting, position the wire close enough to the pivot to improve control without contacting the joint. | Near the inner half of the jaws | The shorter distance generally provides better mechanical control and reduces hand effort. |
| Distance from the cutting edge | When cutting, place the wire completely into the designated cutting section rather than partially across the edge. | Fully seated in the cutter notch or cutting zone | Reduces uneven loading, slipping, and possible damage to the cutting edges. |
| Grip pressure | Apply only enough pressure to hold the wire securely before increasing force gradually. | Firm hold without crushing or deforming the wire | Excessive pressure can damage soft wire, insulation, or the tool jaws. |
| Insulated wire handling | Grip the insulated section only when the tool and task are suitable for insulated wire; avoid cutting or scraping the insulation unintentionally. | No visible cuts, deep marks, or exposed conductor | Maintains insulation integrity and helps prevent accidental electrical contact. |
| Hand and tool angle | Keep the plier aligned with the intended direction of force and avoid twisting the handles sideways. | Straight, stable alignment with the workpiece | Reduces slipping, wrist strain, and uneven stress on the jaws or wire. |
| Wire condition before use | Remove dirt, oil, and loose strands before positioning the wire between the jaws. | Clean, intact, and free of sharp unwanted bends | A clean surface improves friction and makes the wire easier to control. |
| Final safety check | Confirm that the wire is secure, the jaws are undamaged, and the tool is appropriate for the wire size and task. | Stable wire with no jaw damage or unexpected movement | Prevents tool misuse and lowers the risk of slipping, breakage, or injury. |
A wire plier is small, but it can cause painful mistakes when used carelessly. Choose a tool with clean jaws, a firm pivot, and insulated handles suited to the task. Before touching a wire, disconnect power and confirm it with a suitable tester. I also inspect the insulation for cracks. Small damage can hide larger trouble. Hold the wire firmly, but keep fingers away from the cutting edges. Cut with steady pressure. Do not twist the tool sideways.
For stripping, match the stripping notch to the wire gauge. Squeeze gently until the insulation separates, then pull it along the wire. If copper strands are nicked, cut back and try again. Bend wires with the rounded part of the jaws. This creates a smooth curve instead of a sharp crease. For gripping, place the jaws close to the work area and keep the wire aligned with the joint. A loose grip may mark insulation or launch the wire unexpectedly. That happened to me once. I was rushing.
Tips: Wear eye protection and keep the workspace dry. Use the correct plier size, and let the tool do the work. Never use pliers as a hammer or on energized wiring. After each cut, check for crushed insulation, exposed copper, or an uneven bend. Pause when the result looks wrong. A second attempt is cheaper than a damaged connection.
The chart shows approximate diameters for common solid copper conductors. Select a stripper slot that matches the wire gauge, apply only enough pressure to remove insulation, and avoid nicking the conductor. Use the cutter near the pivot for cleaner cuts, bend wire with controlled pressure, and grip insulated sections whenever possible.
A wire plier works best when its jaws meet cleanly and move without resistance. Before each task, inspect the cutting edges, pivot, handles, and spring. Never force a sticky joint. It may hide rust, grit, or damage. Use the plier only for wire within its rated capacity. Oversized wire can distort the jaws and reduce control.
Cleaning takes only a few careful minutes. Brush away metal dust with a dry, soft brush. Wipe the jaws and handles with a slightly damp cloth. Keep moisture away from the pivot. Dry every surface immediately, especially after working in a humid area. I once stored a damp plier too quickly, and a small rust spot appeared near the joint. It was easy to miss. A light drop of tool oil on the pivot can restore smooth movement, but excess oil attracts dust. Wipe away the residue.
Store the wire plier in a dry drawer or enclosed tool case. Keep it separate from wet tools and loose metal scraps. Close the jaws gently, without squeezing the handles tightly. Check the tool monthly for rust, loose screws, cracked grips, or uneven cutting edges. If movement remains rough after cleaning, stop using it and seek professional repair guidance. I sometimes inspect tools too quickly. That habit needs correcting. Small defects can become unsafe during a demanding cut. Clean tools last longer. They also give more predictable results.